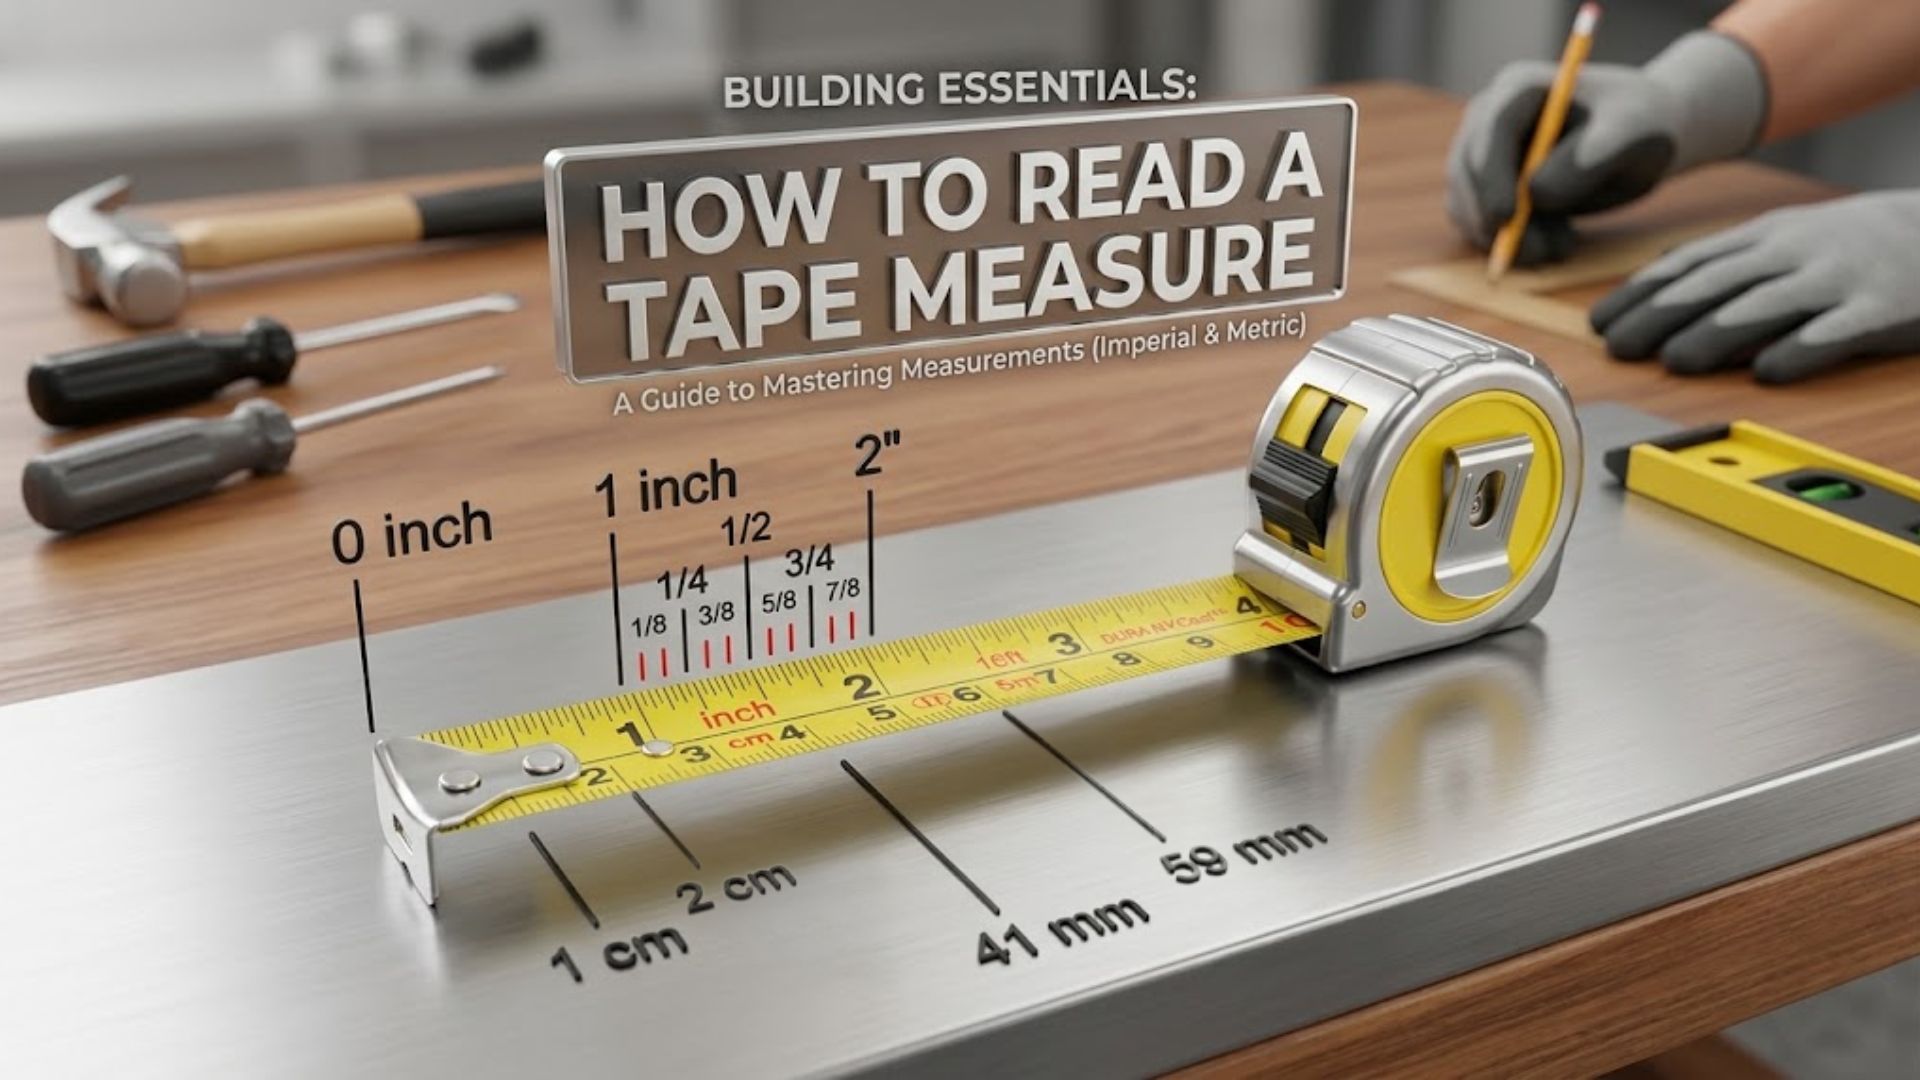
How To Read A Tape Measure
A 2026 guide to reading metric and imperial tape measures, understanding fractions, hook movement, inside measurements, and the differences between pocket, sewing, and body tapes.
How To Read A Tape Measure
Reading a tape measure sounds simple until you hit the parts people actually struggle with: fractions of an inch, crowded blade markings, floating hooks, internal measurements, and the fact that not all tape measures are built the same way.
A better 2026 answer has to do more than repeat that “big numbers are inches” or “small marks are millimeters.” It has to explain how different tape formats are meant to be read, where beginners misread them, and why a pocket tape, sewing tape, and body measuring tape are similar but not identical tools.
The short answer
A tape measure is read by finding the nearest whole unit first, then counting the smaller marks between those whole units.
- On a metric tape, the large numbers usually show centimeters and the smaller marks show millimeters.
- On an imperial tape, the large numbers usually show inches and the smaller marks show fractions such as
1/2,1/4,1/8, or1/16.
That is the basic rule. The rest of the article is about reading those marks correctly and avoiding the mistakes that make measurements drift.
Step 1: Identify what kind of tape you are holding
Not every tape measure uses the same visual logic. Before reading anything else, check the tape type.
Pocket tape measure
This is the retractable metal tape used in DIY, carpentry, furniture checks, and home projects. It usually shows:
- a rigid or semi-rigid blade
- large inch or centimeter markings
- a metal hook at the end
- a blade lock on the case
Soft sewing tape
This is the flexible cloth, vinyl, or fiberglass tape used for tailoring and fabric work. It usually shows:
- a flat flexible strip
- inch and centimeter scales
- no rigid hook
- simple printed markings without a case
Body measuring tape
This is a specialized body-focused subtype designed for waist, hips, thighs, chest, and arms. It may include:
- a retractable plastic housing
- a pin or slot lock
- a reading window
- a loop-based measurement flow rather than a straight pull
This difference matters because body tapes are often easier to read in use, but they do not always look like a standard contractor tape.
Step 2: Read a metric tape measure
Metric tapes are usually easier for beginners because the scale is decimal and evenly structured.
What the markings mean
- each large numbered section usually marks 1 centimeter
- each small line between them usually marks 1 millimeter
- there are 10 millimeters in 1 centimeter
- there are 100 centimeters in 1 meter
So if you see a mark just after 4 cm, that first small tick is 4.1 cm or 41 mm. The second is 4.2 cm or 42 mm, and so on.
Quick example
If the tape lines up at the seventh small mark after 12 cm, the measurement is:
12.7 cm, or127 mm
This is one reason metric tapes are often preferred in technical and manufacturing contexts. The scale is cleaner, easier to convert, and easier to communicate.
Step 3: Read an imperial tape measure
Imperial tapes are where most reading mistakes happen, especially for people who do not work with fractions often.
What the markings mean
- each large number usually marks 1 inch
- the longest line between inch numbers usually marks 1/2 inch
- the next most prominent lines often mark 1/4
and3/4 inch - smaller lines mark 1/8 inch
- the smallest common lines mark 1/16 inch
So between 1 and 2, you are not just seeing random short marks. You are seeing subdivisions of one inch.
Common inch fractions in order
Between one whole inch and the next, the marks usually go like this:
1/16, 1/8, 3/16, 1/4, 5/16, 3/8, 7/16, 1/2, 9/16, 5/8, 11/16, 3/4, 13/16, 7/8, 15/16
That sounds more intimidating than it is. In practice, most people only need to recognize these anchors quickly:
1/21/43/41/83/85/87/8
Quick example
If the reading is on the small line just after 3 1/2, the measurement is 3 9/16 inches.
If the reading is on the line just before 4 3/4, the measurement is 4 11/16 inches.
That is why reading imperial tapes gets easier when you stop trying to decode every line from scratch and instead learn the pattern of fractional spacing.
Step 4: Understand the hook movement
One of the most misunderstood parts of a pocket tape measure is the metal hook at the end. On a good tape, that hook usually moves slightly in and out. This is not a defect. It is intentional.
The movement compensates for the thickness of the hook itself.
- When you push the tape against an inside surface, the hook shifts one way.
- When you pull the tape over an outside edge, the hook shifts the other way.
That tiny amount of play is what helps a tape measure stay accurate in both situations.
If a user does not understand this, they often assume the tape is loose or poorly made. In reality, a floating hook is usually part of the accuracy design.
Step 5: Read inside measurements carefully
Inside measurements are one of the biggest sources of beginner error.
Examples include:
- the distance between two walls
- the width of a drawer opening
- the inside width of a shelf space
Why people get this wrong:
- they push the tape case into one side
- they read the visible blade number
- but they forget to account for the physical length of the tape case
Some tape measures print the case length on the housing or use a viewing window that compensates for it. Many do not. If your tape does not compensate automatically, you need to add the case length yourself or bend the blade at the contact point and read from there carefully.
This is one of those details older how-to articles mentioned, but it matters even more now because many people buy very cheap tapes online without realizing not every case is designed the same way.
Step 6: Know that body tapes and sewing tapes are read a little differently
A modern guide should not pretend every tape measure is a metal contractor tape. If you are working with clothing, body tracking, or soft measuring tools, the reading experience changes.
Soft sewing tape
With a sewing tape, the reading itself is usually straightforward:
- large markings show inches or centimeters
- the tape lies flat
- the measurement is taken where the zero end meets the measured point
The hard part is usually not reading the scale. It is keeping the tape straight, flat, and untwisted.
Body measuring tape
With a body measuring tape, especially a retractable one, the reading is often taken through:
- a viewing window
- a slot lock
- a body loop tightened to a consistent tension
That means the “reading” problem is less about tiny fractions and more about using the loop correctly and keeping tension repeatable.
This is also why body-focused products such as REIDEA deserve to be treated as their own tape-measure subtype. They solve a different problem than a simple soft tailor tape.
The most common mistakes people make
1. Reading the wrong side of a dual-scale tape
Some tapes show inches on one edge and centimeters on the other, or print both on the same face. Always check which scale you are using before you write the number down.
2. Starting from the case instead of true zero
On some tapes, especially cheap or decorative ones, people eyeball from the housing instead of the actual zero point. That can throw off the result immediately.
3. Ignoring hook play
If you hook the blade over an edge and pull too hard, or if the hook is bent, your reading can shift.
4. Guessing fractions instead of reading the mark pattern
Many beginners see a crowded inch scale and round it mentally. That is how 5/8 turns into 1/2 or 3/4.
5. Letting a soft or body tape twist
With sewing tapes and body tapes, the reading can be numerically correct but practically useless if the tape is twisted or sitting at a different angle each time.
A better 2026 rule for accuracy
If you want a measurement you can trust, do not just “read the line.” Control the whole measurement setup:
- use the right tape type for the job
- make sure the zero point is seated properly
- keep the tape flat or straight
- check which unit system you are reading
- repeat the measurement once before recording it
This matters even more for body tracking and sewing than for basic home DIY because the user, not the tape, is usually the biggest source of variation.
When each tape type is easiest to read
- Pocket tape: easiest for straight rigid surfaces and room or furniture measurements
- Soft sewing tape: easiest for fabric, clothing, and flexible curved surfaces
- Body measuring tape: easiest for repeat waist, hip, thigh, and chest measurements taken alone
If your search started with “how to read a tape measure,” there is a good chance you also need to know which tape is best for the job, not just what the marks mean.
FAQ
What do the little lines on a tape measure mean?
They are subdivisions between the larger units. On metric tapes they usually mark millimeters. On imperial tapes they usually mark fractions of an inch.
Why does the tape measure hook move?
It is designed to compensate for the thickness of the hook so inside and outside measurements can both be accurate.
Is a body measuring tape read the same way as a pocket tape?
Not exactly. The underlying units are the same, but body tapes often use a loop, lock, or reading window rather than a straight blade with a metal hook.
Is metric easier than imperial?
For most beginners, yes. Metric is easier because it uses decimals and evenly spaced millimeter subdivisions. Imperial reading becomes easier with practice, especially once you recognize common fractions.
Go deeper on the most confusing parts
If your question is more specific than just “how do I read the lines?”, these follow-up guides go deeper into the parts people most often misunderstand:
- Why Does A Tape Measure Hook Move?
- How To Measure Inside Dimensions With A Tape Measure
- How To Read 16, 19.2, and 24 Inch Layout Marks
- Tape Measure Tricks That Are Actually Useful
Bottom line
To read a tape measure well, you need more than the old “big marks and small marks” explanation. You need to know which scale you are reading, how the subdivisions work, how the hook affects accuracy, and whether you are using a pocket tape, soft sewing tape, or body tape. That is the modern version of the skill: not just reading the markings, but reading the right tool the right way.
Prefer an offline copy? Download this article as PDF .